Make DevTool
Modified on Wed, 29 May, 2024 at 1:13 PM
Make DevTool allows you to debug your Make scenarios by adding an extra pane to the Chrome Developer Tools. Using this new debugger pane, you can check all the manual runs of your scenario, review all the performed operations and see the details of every API call performed. Additionally, using Make DevTools you can see which module, operation, even which single response causes an error in your scenario. This helps you debug your scenario, and get your scenario back on track.
Open the Chrome Web Store and search for Make DevTool. You can also use this direct link to install the extension.
Click the Add to Chrome button. Confirm your decision in the pop-up window that opens.
The Make DevTool is installed to the Chrome Developer Tools pane.
To start using the Make DevTool open a scenario in Make, press Control+Shift+I or F12 (Windows) or Command+Option+I (Mac) on your keyboard to open Chrome Developer Tools and switch to the Make tab.
Note
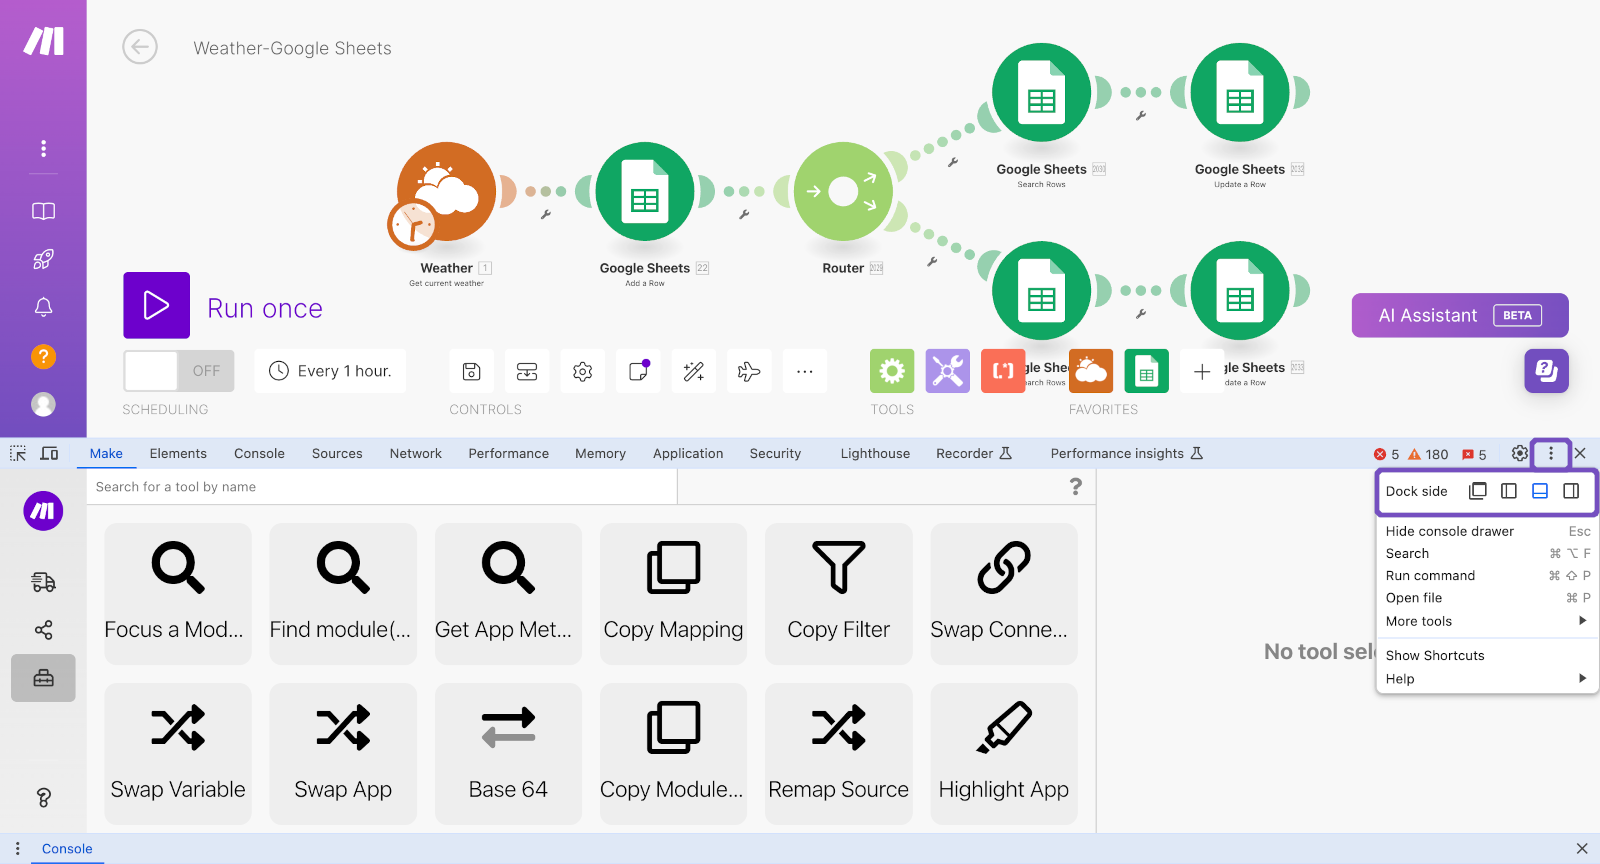
We recommend docking the Chrome Developer Console to the bottom to maintain a better view of your modules.
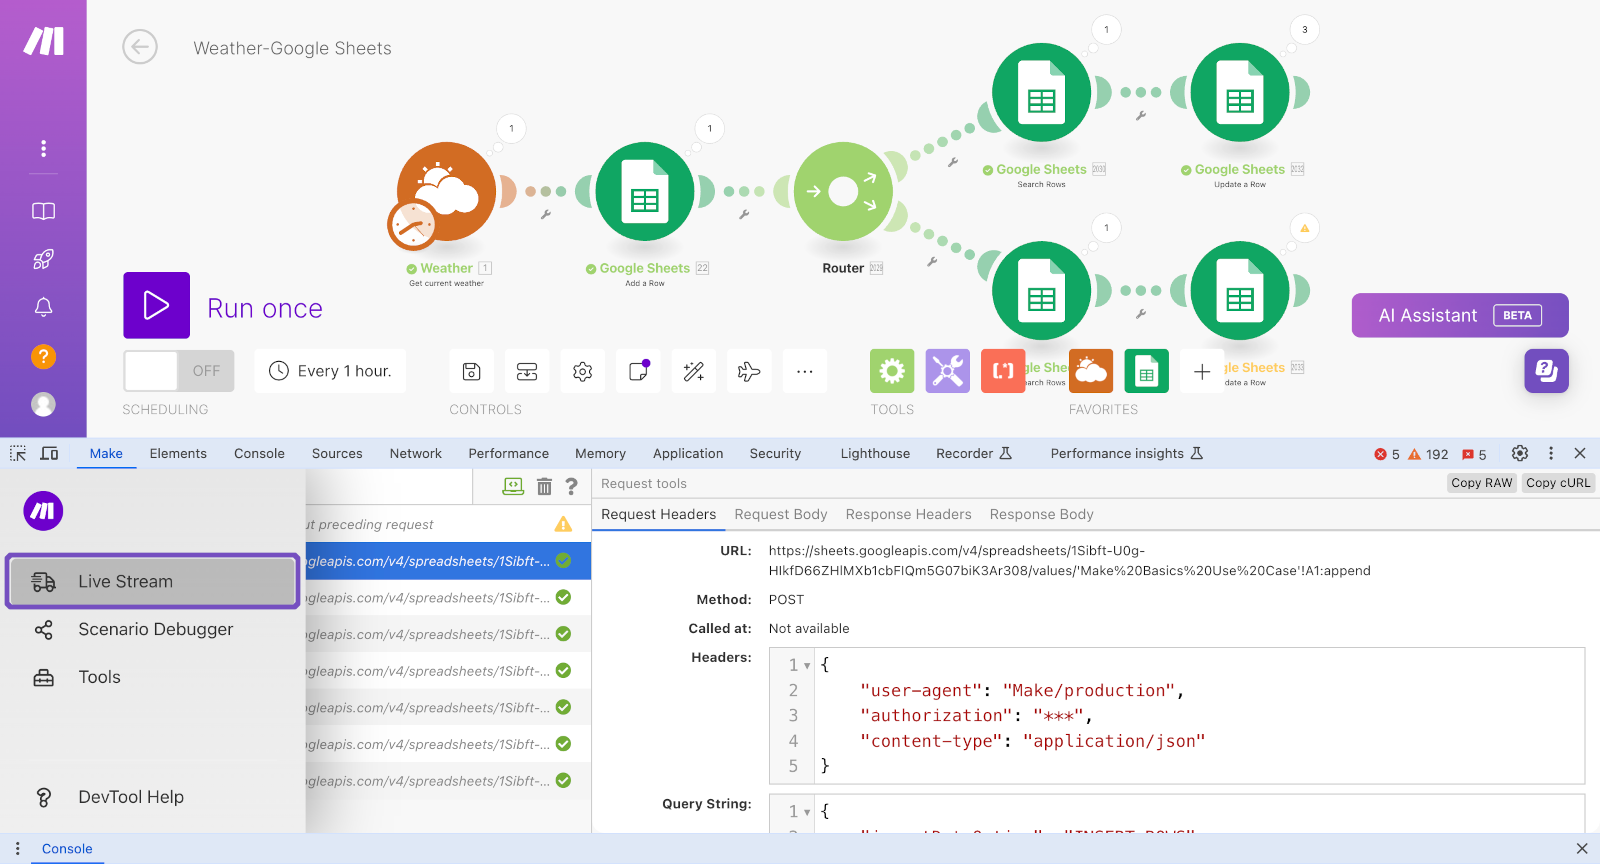
Live Stream displays what is happening in the background of your scenario when you hit the Run once button.
It allows you to view the following information for each module in your scenario:
Request Headers (API endpoint URL, HTTP method, time and date the request has been called at, request headers, and query string)
Request Body
Response Headers
Response Body
After you run a scenario select Live Stream from the left-side panel and click one of the tabs in the right panel of Make DevTool to view the information.
Enter the search term into the search field in the left panel of Make DevTool to only display requests and responses that contain the search term.
To clear the list of requests recorded by Make DevTool, click the bin icon next to the search field.
To enable logging into the console, click the computer icon ( ) next to the search field.
When logging is enabled the color of the computer icon switches to green.
Click the same icon one more time if you want to disable logging. The icon turns gray when the feature is disabled.
To retrieve the raw JSON content of the request, click the Copy RAW button in the top-right corner of the DevTool's panel.
Similarly, you can retrieve cURL using the Copy cURL button next to Copy RAW in the top-right corner of the Make DevTool's panel.
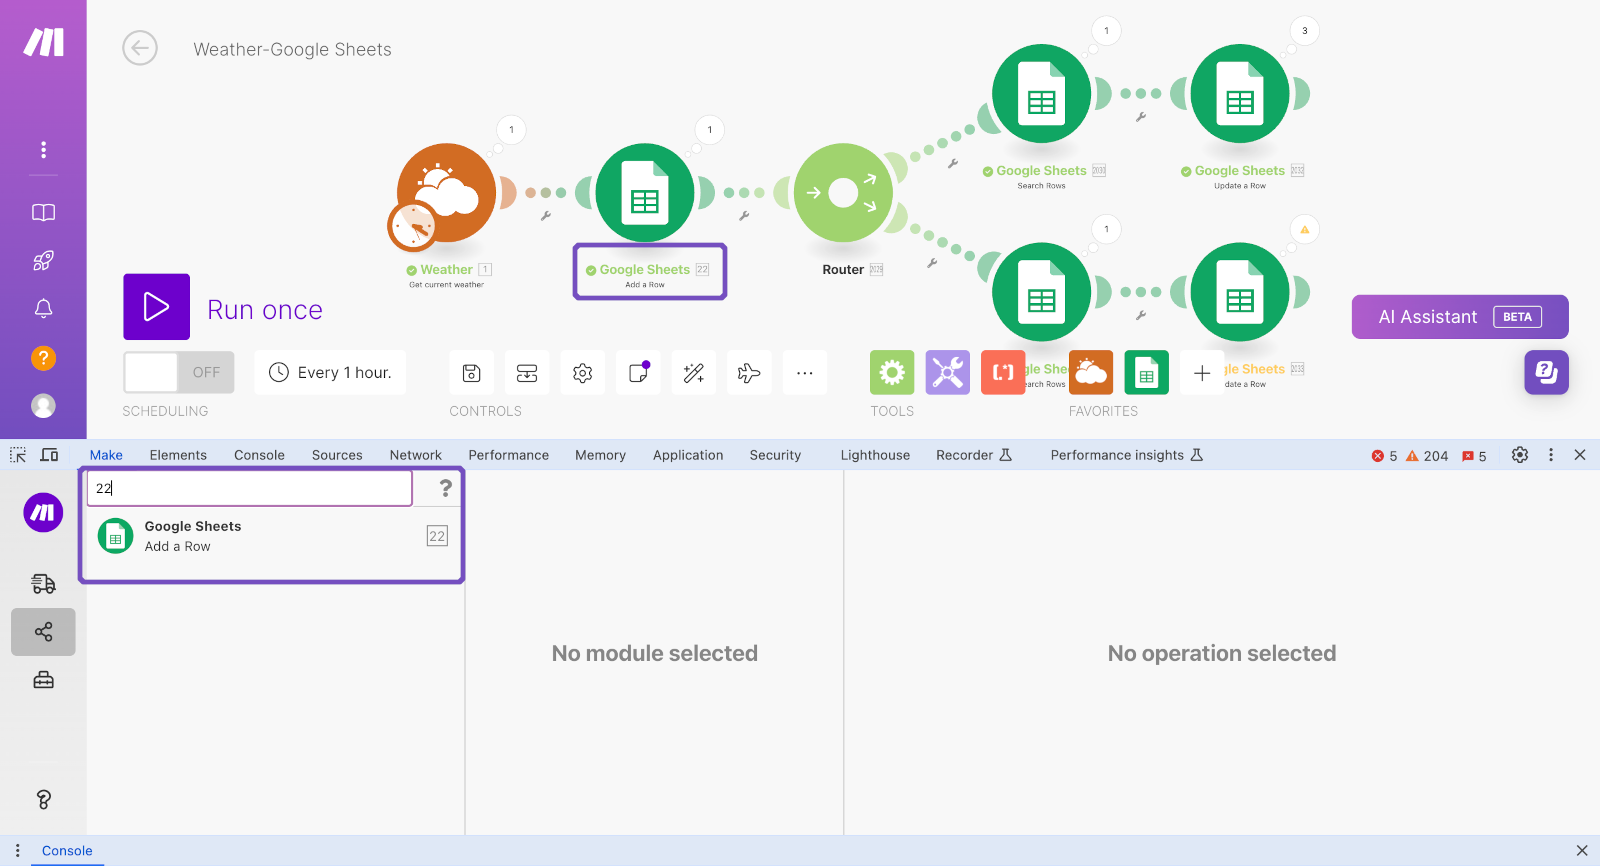
Scenario Debugger shows you the historical logs of your scenario. The Scenario Debugger displays the history of the scenario runs and enables you to search for modules by their names or IDs.
To search for the module by its name or ID number, enter the search term in the search field in the left panel of the DevTool.
Double-click the module's name in the list to open its settings in the scenario editor.
You can open the request details by clicking the operation in the list.
The following set of tools makes setting up your scenario easier.
Opens settings of the selected module.
Note
Module ID is the number you see in your scenario editor next to the name of the module. Same apps used multiple times in one scenario will have different IDs for each module.
Module ID | Enter the ID of the module for which you want to open settings and click the Run button |
Allows you to search modules' values for the specified term.
Keyword | Enter the term you want to search for and click the Run button. The numbers in the output are IDs of modules that contain the term you have searched for. |
Use Only Values | You can enable this option to only search in module fields' values, or disable it to also search in module fields' names. |
Note
The search is performed through the name and label parameters.
Retrieves metadata of the app by the app's module name or ID. This is useful, for example, when you need to retrieve the app's version used in your scenario for the technical support or the developer of the app.
Source Module | Select the module for which you want to retrieve metadata. |
Copies values from the source module to the target module.
Caution
Make sure you set the correct source and target modules because values in the target module will be overwritten. If you select different types of modules, values in the target module will be deleted.
Source Module | Select the module or enter the ID of the module from which you want to copy field values. |
Target Module | Select the module or enter the ID of the module into which you want to insert the source module values. |
Tip
Switch on the map toggle to manually enter the ID of the modules for mapping.
When the source and target modules are specified, click the Run button to perform the action.
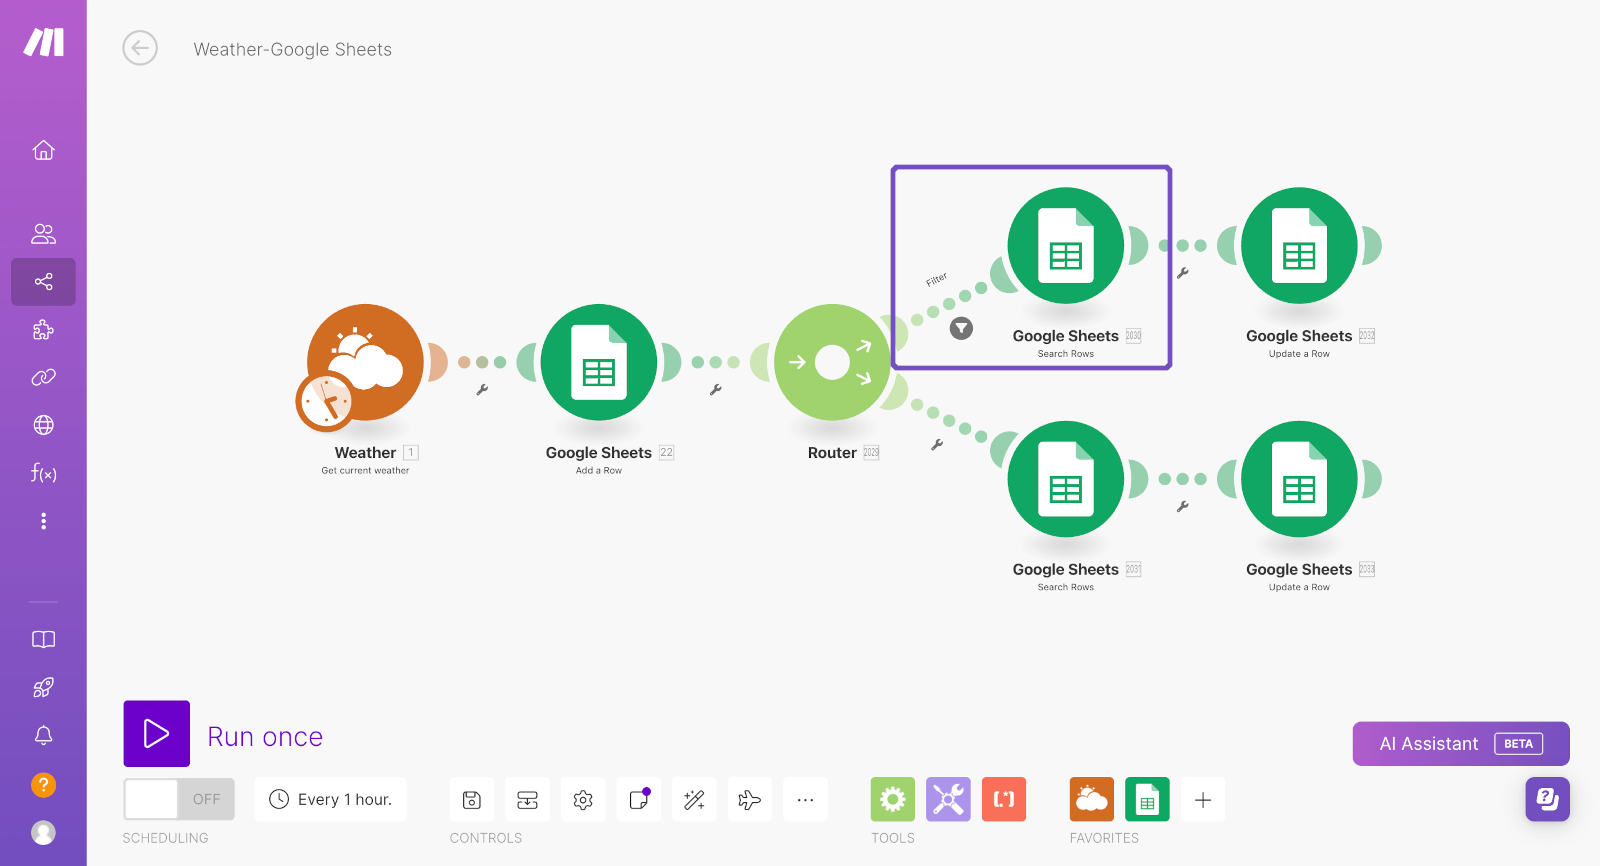
Copies the filter settings from the source module to the target module.
Note
The copy action is performed on the filter placed on the left side of the selected module.
Source Module | Select the module or enter the ID of the module from which you want to copy filter values. |
Target Module | Select the module or enter the ID of the module into which you want to insert the filter values from the source module. Note that the values in the target module will be overwritten. |
Preserve Fallback Route setting | If enabled and the source filter is set as the fallback route, then the target filter is also set as the fallback route. |
When the source and target modules are specified, click the Run button to copy the filter.
Duplicates a connection from the source module to every module of the same app in the scenario .
Source Module | Select the module or enter the ID of the module from which you want to duplicate the connection and set the same connection for every module of the same app in your scenario. |
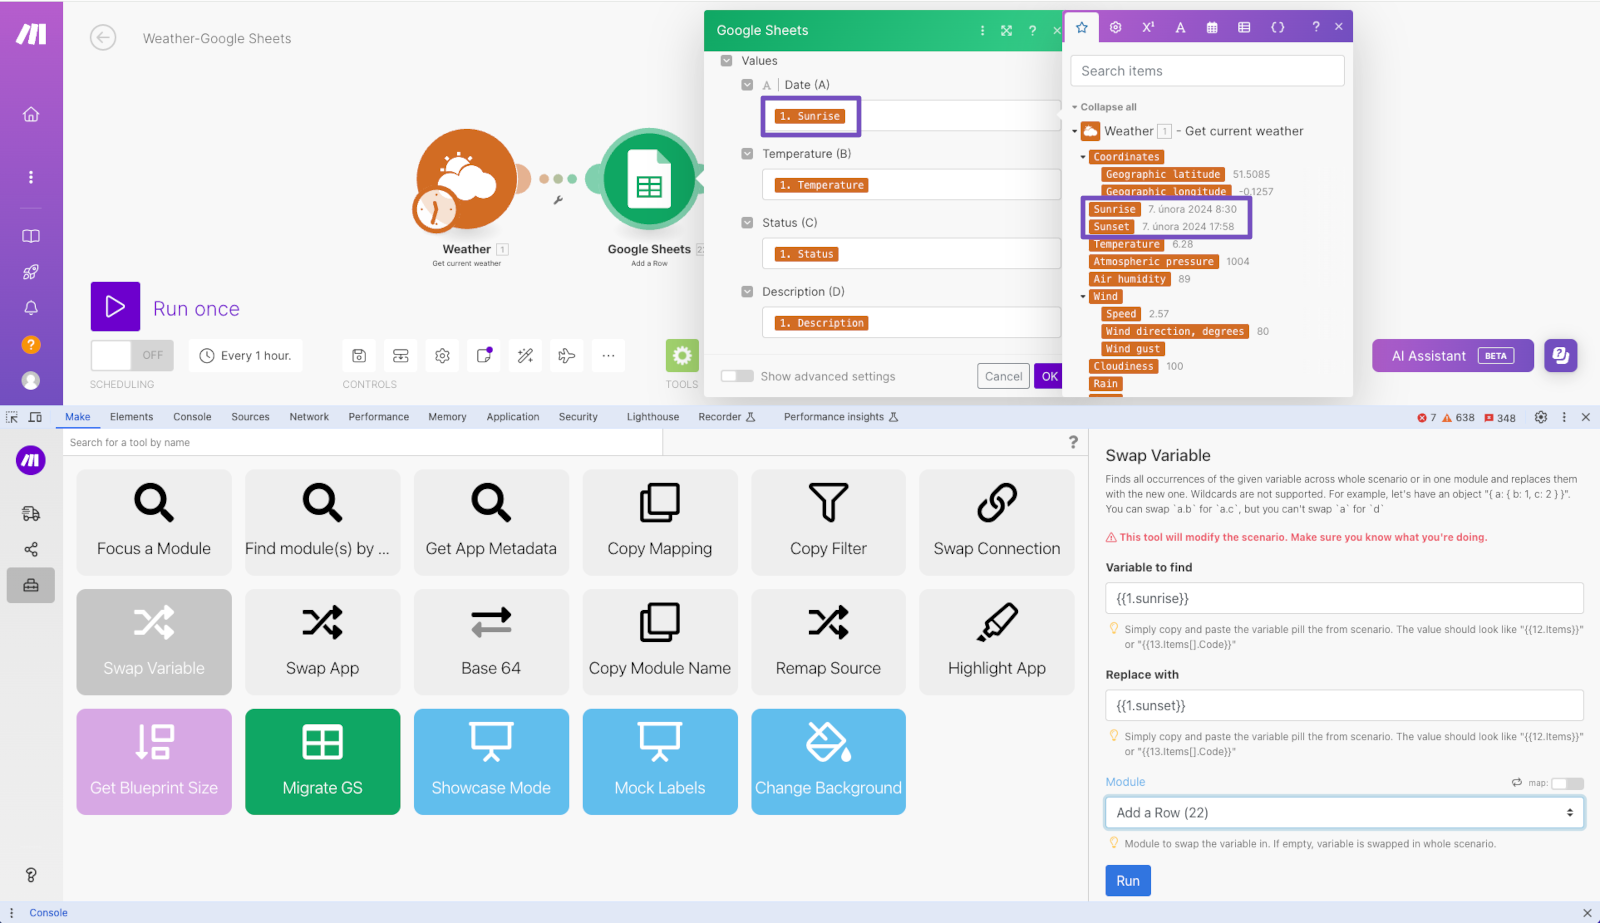
Searches for specified variables in the scenario and replaces them with a new variable.
Variable to Find | Select the variable which you want to be replaced from the module in your scenario and copy it to the Variable to Find field. You can also drag and drop the variable into the field. After it is done the format of the value in the field will look like this: {{5.value}}. |
Replace With | Copy and paste, or drag and drop the variable you want to use instead of the variable specified in the field above.The format of the value in the field will look like this: {{5.value}}. |
Module | Select the module in which you want to replace the variable. If no module is selected, the variable will be replaced in the entire scenario. |
When all is set up, click the Run button to perform the action.
Replaces the selected app version in your scenario with another app version.
This tool can be used, for example, to upgrade Gmail and Email apps' modules to the latest version. For more details please refer to the Upgrading Gmail and Email App Versions Using Make DevTool article.
Warning
Before swapping make sure that the version you’ve selected supports all the modules and functions you might need for your scenario.
Allows you to encode the entered data to Base64 or to decode Base64. This tool can be useful when you want to search for particular data in the encoded request.
Operation | Select whether you want to encode the data from the Raw Data field (below) to Base64 or decode Base64 to Raw Data. |
Raw Data | Enter the data you want to encode to Base64 or Base64 you want to decode to raw data, depending on the option selected in the Operation field above. |
When the input is specified, click the Run button to perform the selected action.
Copies the name of the selected module to your clipboard.
Module | Select the module whose name you want to copy. |
When the module is selected, click the Run button to copy the module's name.
Allows you to change the mapping source from one module to another. You can do it for the already existing module in your scenario as well as add a new one.
Source Module | Select the module you want to be replaced as the mapping source for other modules in your scenario. |
Target Module | Select the module you want to use as a new mapping source. |
Module to Edit | In case you don't want to change the mapping in the entire scenario, select the module you want to change the mapping for. |
When all is set up, click the Run button to perform the action.
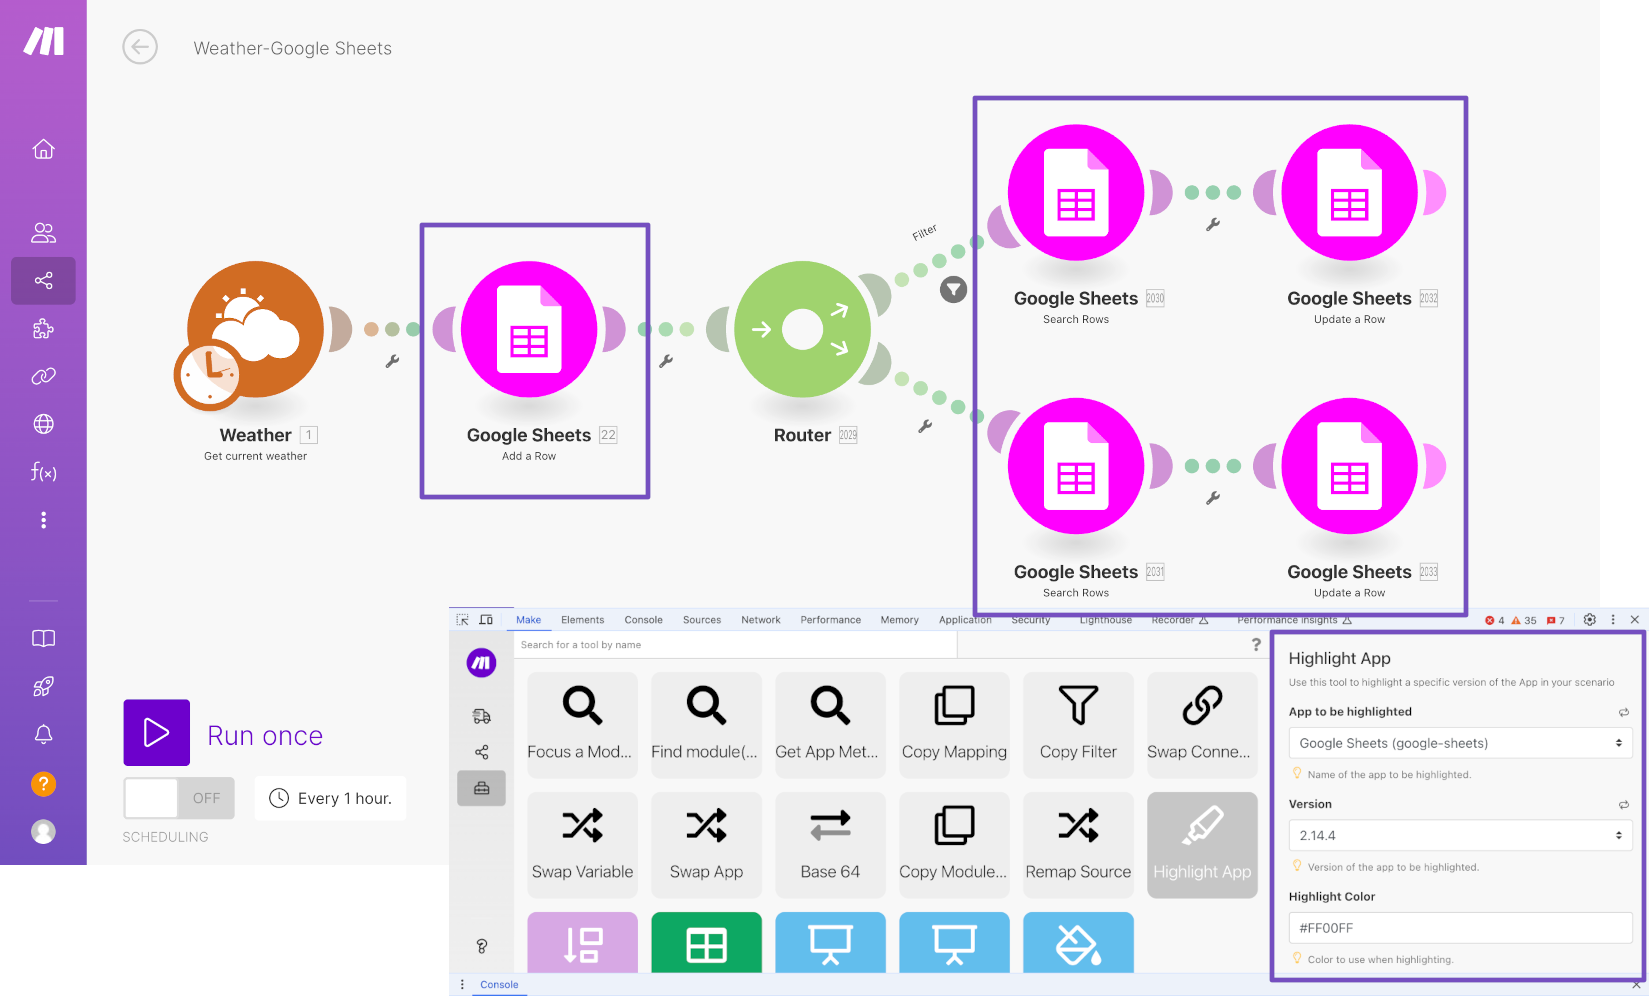
Highlights modules of the specified app in your scenario.
App to be Highlighted | Select the app you want to be highlighted in your scenario. |
Version | Select the version of the app you want to be highlighted. |
Highlight Color | Enter the color hex you want to use for highlighting modules. |
This tool is made especially to upgrade Google Sheets (legacy) modules to the latest Google Sheets version. It adds a new version of the module just after the legacy version of the module in the scenario route.
This tool automates steps 3, 4, 5 described in the Replacing Legacy Modules With New Modules article.
Was this article helpful?
That’s Great!
Thank you for your feedback
Sorry! We couldn't be helpful
Thank you for your feedback
Feedback sent
We appreciate your effort and will try to fix the article
