Braintree
Modified on Tue, 13 Aug, 2024 at 10:05 AM
The Braintree modules allow you to watch, create, update, and delete the customers in your Braintree account.
Prerequisites
A Braintree account
In order to use Braintree with Make, it is necessary to have a Braintree account. If you do not have one, you can create a Braintree Sandbox account at braintreepayments.com/sandbox.
Notice
The module dialog fields that are displayed in bold (in the Make scenario, not in this documentation article) are mandatory!
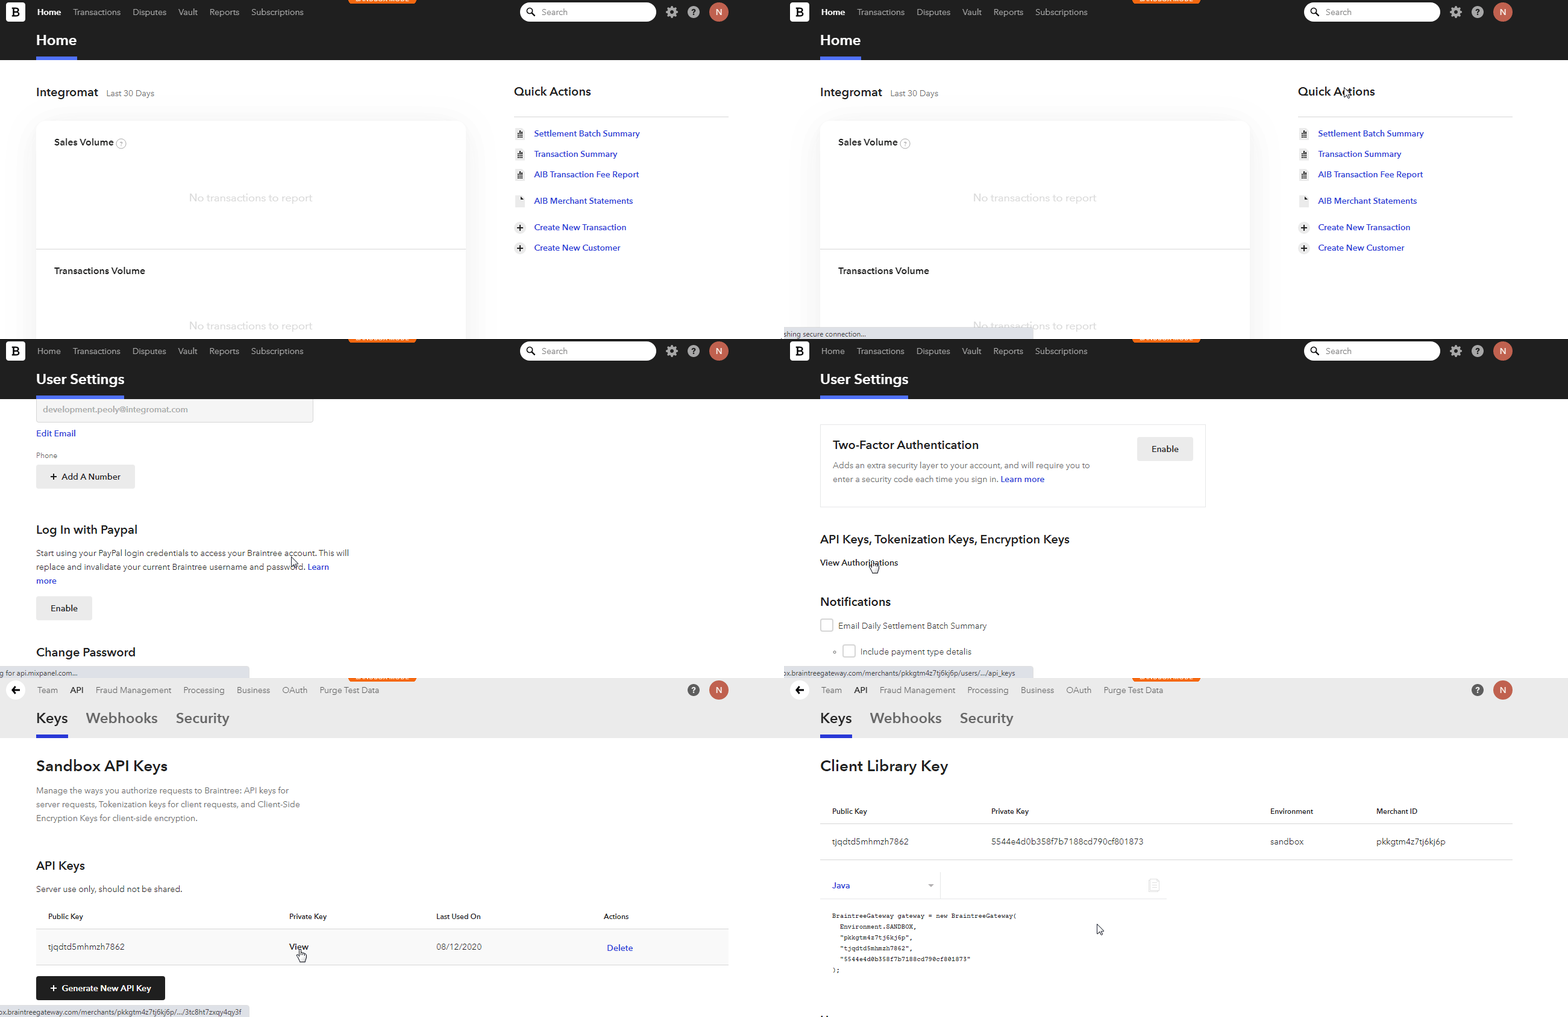
To connect your Braintree account to Make you need to obtain the API Key from your Braintree account and insert it in the Create a connection dialog in the Make module.
1. Log in to your Braintree account.
2. Click Your Profile Icon> My User > View Authorizations.
3. Copy the Public Key and Private Key to your clipboard.
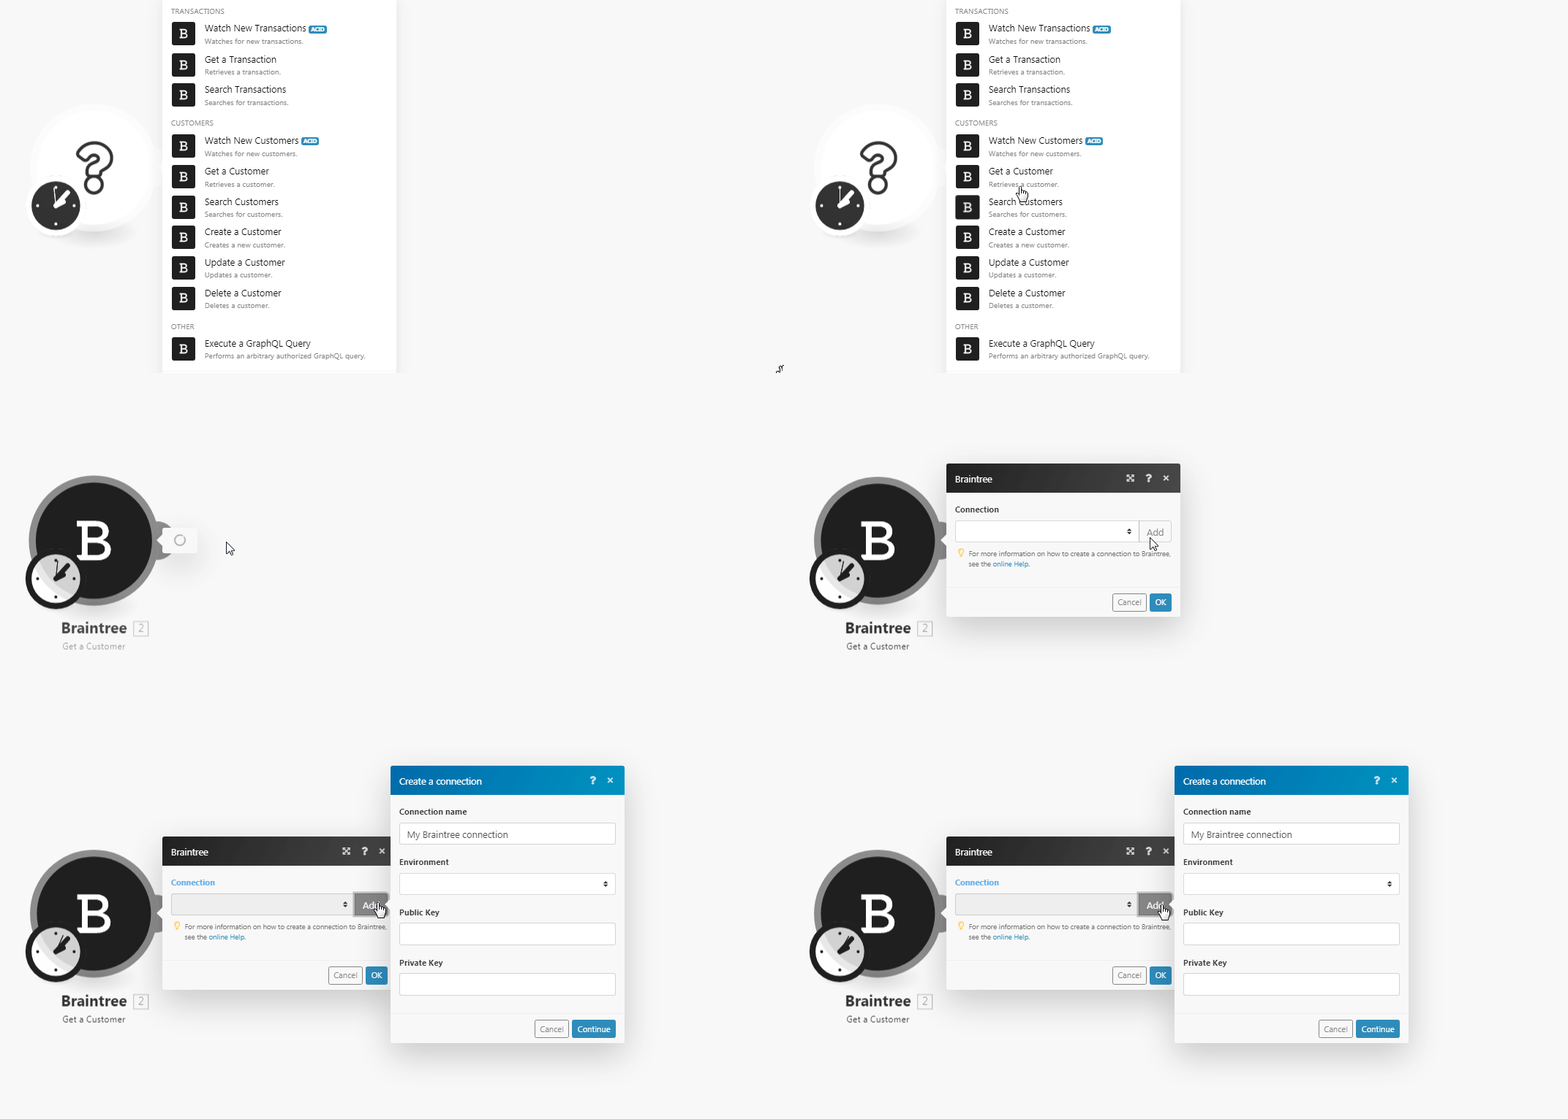
4. Go to Make and open the Braintree module's Create a connection dialog.
5. In the Connection name field, enter a name for the connection.
6. In the Environment field, select the required environment.
7. In the Public Key and Private Key fields, enter the public key and private key copied in step 3. Click Continue.
The connection has been established.
Watches for new transactions.
Connection | |
Limit | Set the maximum number of new transactions Make should return during one scenarioexecution cycle. |
Retrieves a translation.
Connection | |
Transaction ID | Select the Transaction ID whose details you want to retrieve. |
Searches for transactions.
Connection | |
Transaction ID | Select the Transaction ID you want to search. |
Status | Select the status of the transaction. For example, Failed. |
Customer ID | Select the Customer ID whose transactions you want to search. |
Payment Method Snapshot Type | Select the payment method snapshot type for searching only those transactions. |
Source | Select the source type of the transactions. |
Filter | Select the filter to search the transactions. |
Limit | Set the maximum number of transactions Make should return during one scenario execution cycle. |
Watches for new customers.
Connection | |
Limit | Set the maximum number of new customers Make should return during one scenario execution cycle. |
Retrieves a customer.
Connection | |
Customer ID | Select the Customer ID whose details you want to retrieve. |
Searches for customers.
Connection | |
Customer ID | Select the Customer ID whose details you are searching for. |
Date of Creation | Select the date on which the customer account is created to search only those customers. |
Filter | Select the filters to search only those customers based on the specified criteria. |
Limit | Set the maximum number of new transactions Make should return during one scenarioexecution cycle. |
Creates a new customer.
Connection | |
Enter the email address of the customer. | |
First Name | Enter the first name of the customer. |
Last Name | Enter the last name of the customer. |
Company | Enter the company name to which the customer belongs. |
Phone Number | Enter the phone number of the customer. |
Updates a customer.
Connection | |
Customer ID | Select the Customer ID whose details you want to update. |
Enter the email address of the customer. | |
First Name | Enter the first name of the customer. |
Last Name | Enter the last name of the customer. |
Company | Enter the company name to which the customer belongs to. |
Phone Number | Enter the phone number of the customer. |
Deletes a customer.
Connection | |
Customer ID | Select the Customer ID you want to delete. |
Performs an arbitrary authorized GraphQL query.
Braintree uses GraphQL for Managing the APIs. See BraintreePayment GraphQL Documentation.
Connection | |
Query | Enter the query in JSON format. |
Variables Data | Select the variable data source type:
|
Variables | Add the variables: Key Enter the Key details in JSON format. Value Enter the key value in JSON format. |
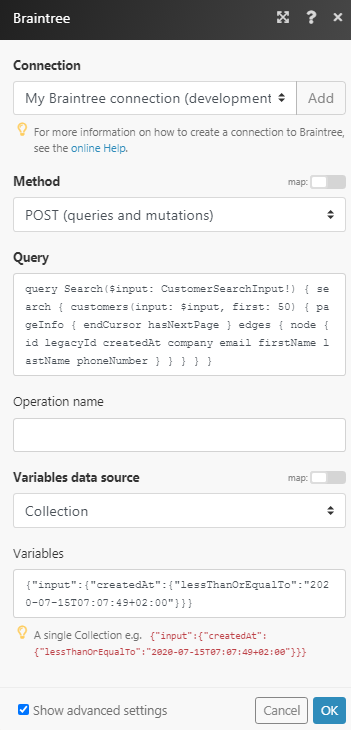
The following GraphQL query returns all the customers from your Braintree Payments account:
Method: POST
Query:
query Search($input: CustomerSearchInput!) { search { customers(input: $input, first: 50) { pageInfo { endCursor hasNextPage } edges { node { id legacyId createdAt company email firstName lastName phoneNumber } } } } }Variables:
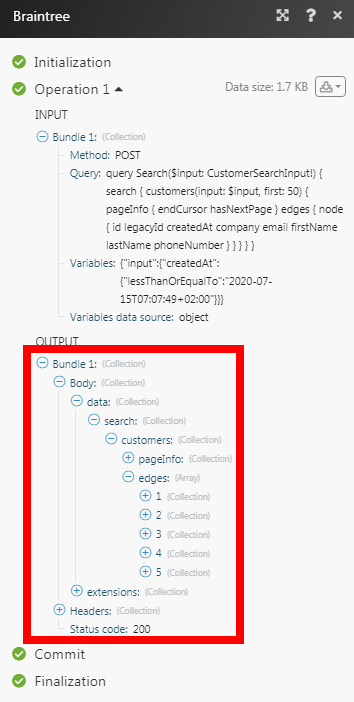
{"input": {"createdAt": {"lessThanOrEqualTo":"2020-07-15T07:07:49+02:00"}}}Matches of the search can be found in the module's Output under Bundle > Body > data. In our example, 5 customers were returned:
Was this article helpful?
That’s Great!
Thank you for your feedback
Sorry! We couldn't be helpful
Thank you for your feedback
Feedback sent
We appreciate your effort and will try to fix the article


