MuleSoft
Modified on Tue, 13 Aug, 2024 at 8:31 AM
With the MuleSoft modules in Make you can trigger cloud hub APIs and call APIs.
To get started with MuleSoft, create an account
You need to obtain OAuth client credentials from your MuleSoft account and insert them in Make .
To connect MuleSoft to Make:
Log in to your MuleSoft account.
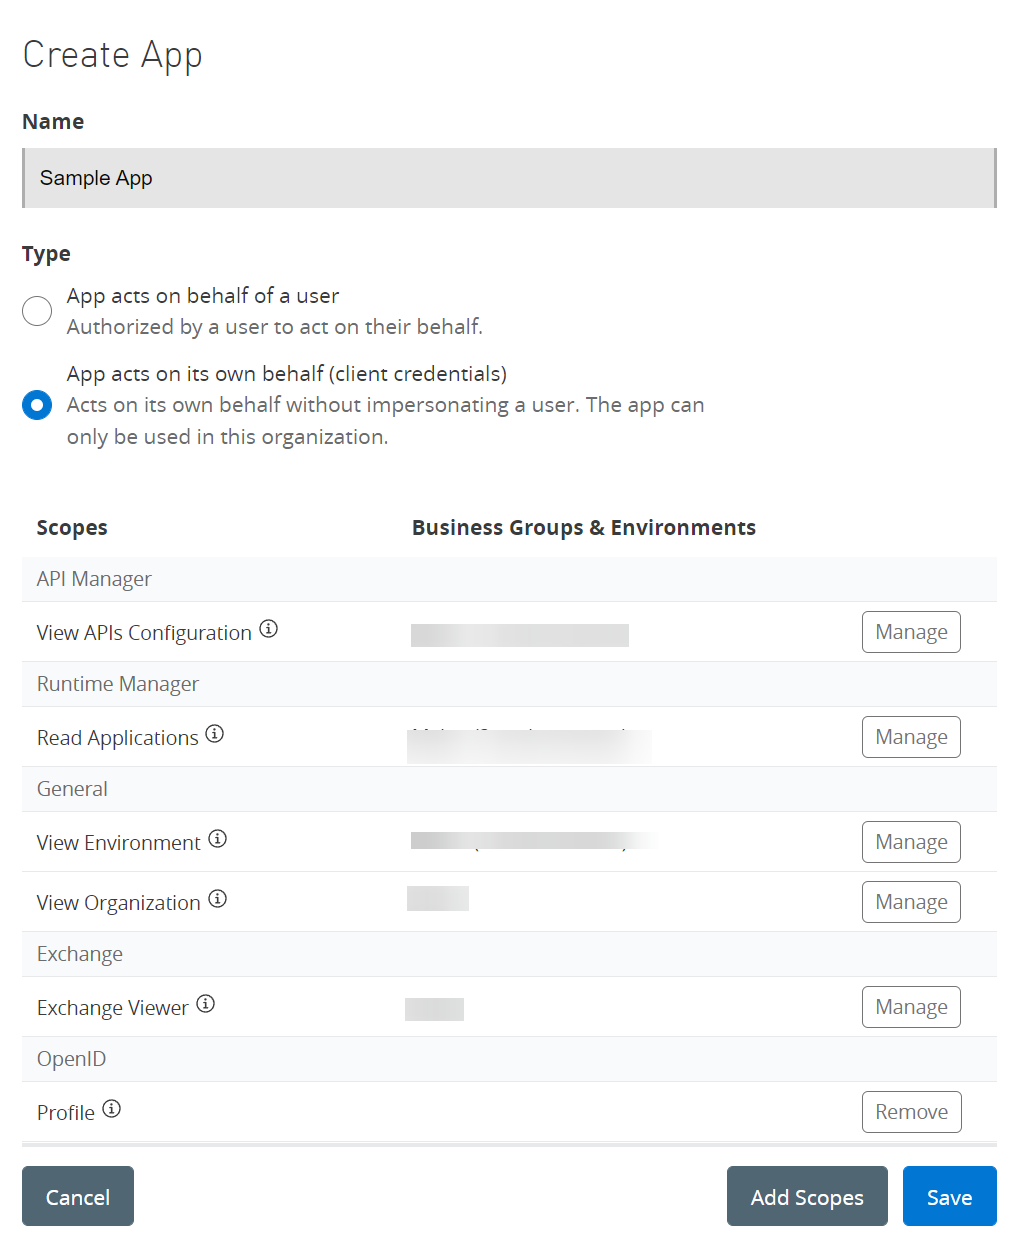
Click your left menu > Access Management > Connected Apps > Create app.
Enter the app details in the table below:
Name
App name.
Type
Select the connection type as App acts on its own behalf (client credentials).
Add Scopes
Add the following minimum scopes:
API Manager: View APIs Configuration
Runtime Manager: Read Applications
General: View Environment, View Organization
Exchange: Exchange Viewer
OpenID: Profile
Review the scopes and click Save.
Click Copy ID and Copy Secret to store the values in a safe place.
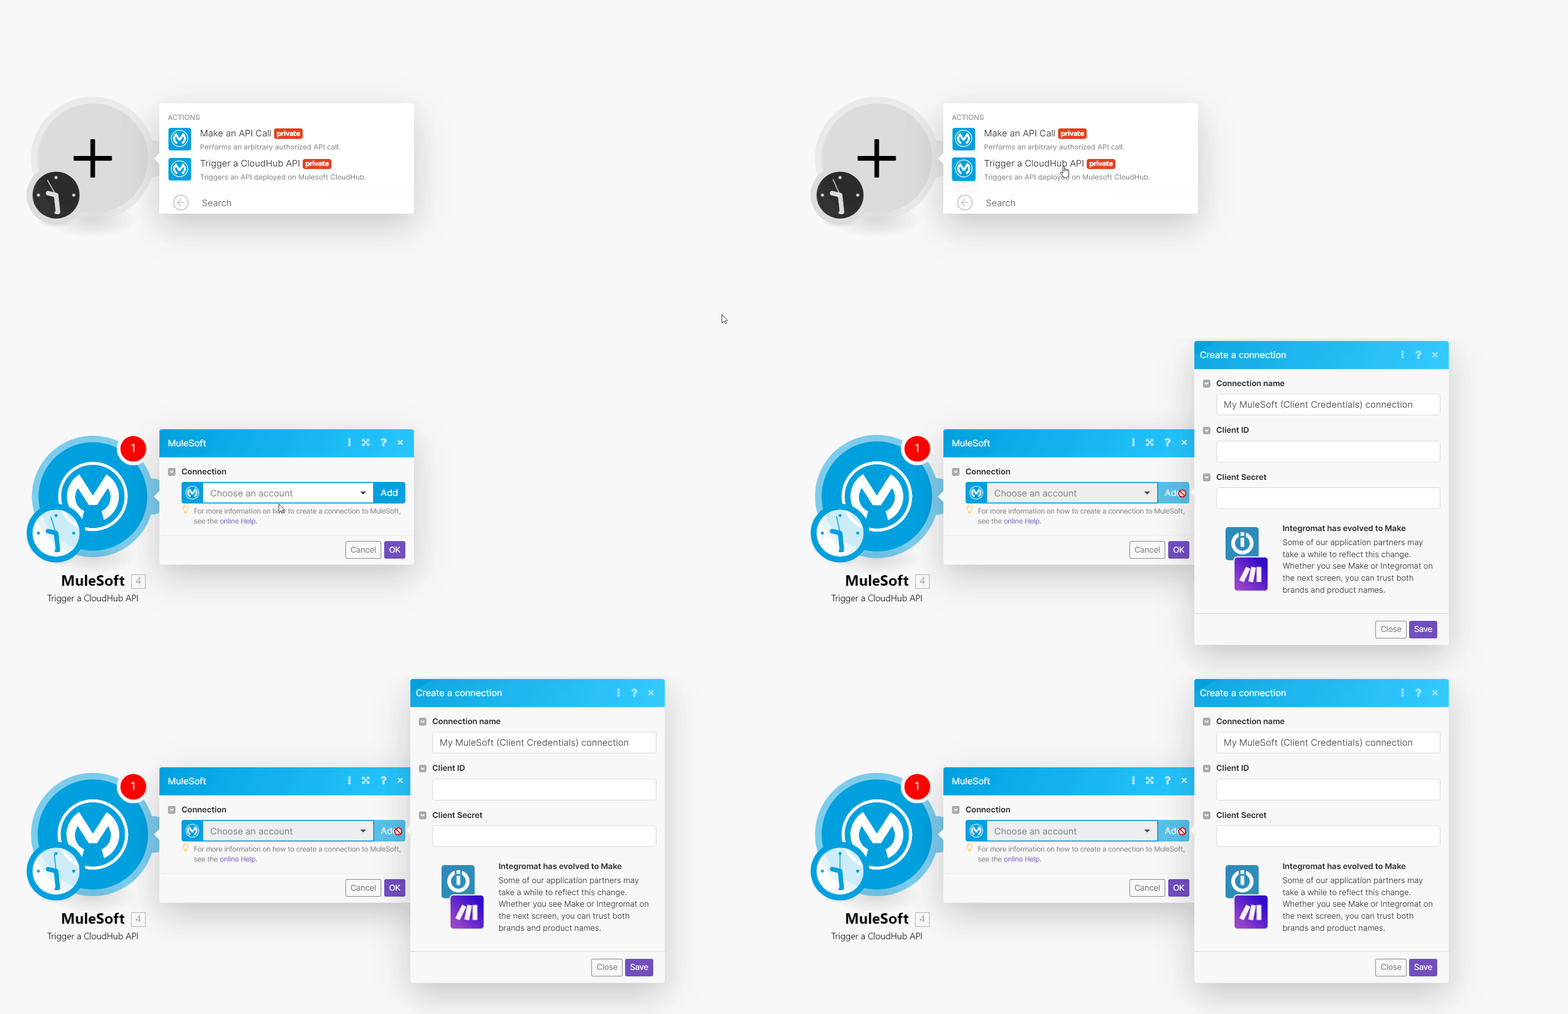
Log in to your Make account and open the MuleSoft module's Create a Connection dialog.
In the Connection name field, enter a name for the connection.
In the Client ID and Client Secret fields, enter the values obtained in Step 6 in the respective fields.
Click Save.
You have successfully connected the MuleSoft app and you can now build scenarios .
CloudHub is a fully managed, containerized integration-Platform-as-a-Service (iPaaS) where you can deploy APIs and integrations as lightweight containers in the cloud.
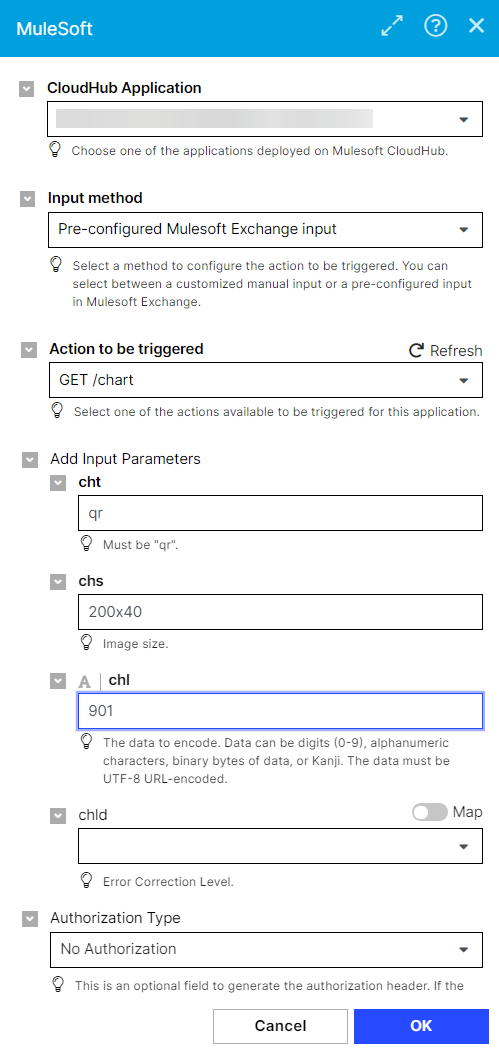
Sends a request to MuleSoft to trigger a CloudHub action.
Connection | |
MuleSoft Environment | Select the environment that contains the CloudHub applications you want to automate. |
CloudHub Application | Select one of the applications deployed on the Mulesoft CloudHub. |
Input method | Select a method to configure the action to be triggered. You can select between a customized manual input or a pre-configured input in the Mulesoft Exchange. |
Action to be triggered | Select one of the actions available to be triggered for this application. |
Add Input Parameters | Add the parameter details that auto-populate based on the option selected for the Action to be triggered field. |
Choose Method | Select or map the HTTPS request method such as |
Specify endpoint | An endpoint relative to the application's base URL. For example, |
Add Input Headers | Add the key-value pair of headers. You can add multiple headers.
|
Optional: Authorization Type | An optional field to generate the authorization header. This field appears when you select Input Method as the preconfigured Mulesoft exchange input. If the desired authorization method is not listed, add the required headers or query strings manually.
|
You can call API endpoints using the following module.
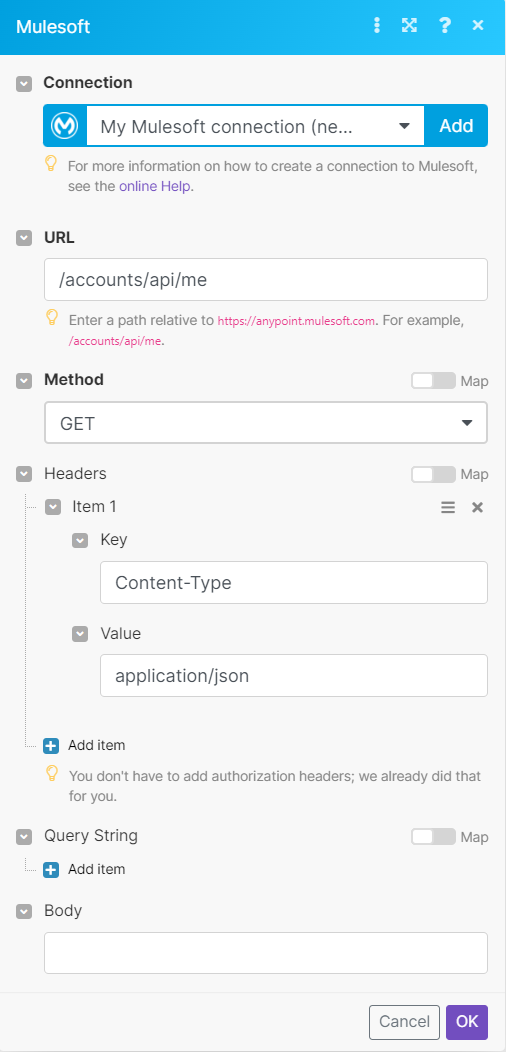
Performs an arbitrary authorized API Call.
Connection | |
URL | Enter a path relative to |
Method | GET to retrieve information for an entry. POST to create a new entry. PUT to update/replace an existing entry. PATCH to make a partial entry update. DELETE to delete an entry. |
Headers | Enter the desired request headers. You don't have to add authorization headers; we already did that for you. |
Query String | Enter the request query string. |
Body | Enter the body content for your API call. |
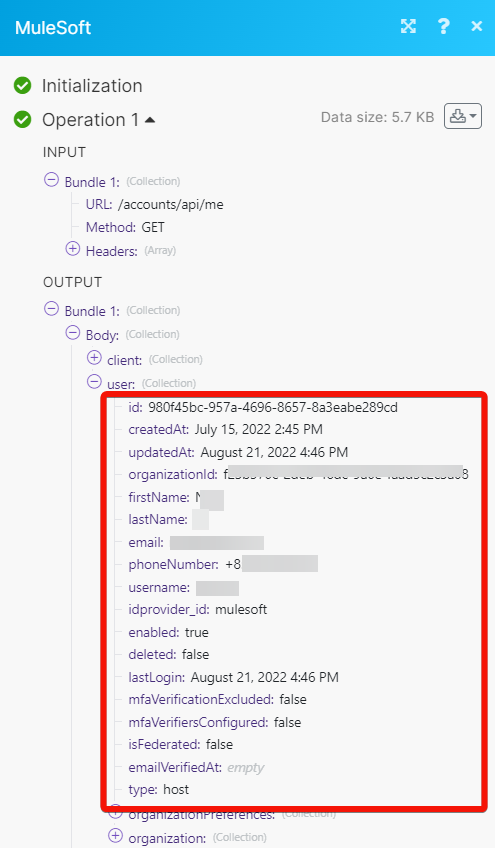
The following API call returns account details from your MuleSoft account:
URL: /accounts/api/me
Method: GET
To see the results, look at the Output module under Bundle > Body.
In our example, the account details were returned:
Was this article helpful?
That’s Great!
Thank you for your feedback
Sorry! We couldn't be helpful
Thank you for your feedback
Feedback sent
We appreciate your effort and will try to fix the article

